Unlock the secrets to radiant, healthy skin with the ultimate guide to facial steaming! From combating blemishes and unclogging pores to improving the absorption of your favorite skincare products, a facial steamer can be a game-changer in your beauty routine. But navigating the world of steamers, understanding their benefits, and mastering proper maintenance can feel overwhelming. This comprehensive guide will equip you with the knowledge you need to choose the right steamer, use it effectively, and extend its lifespan. We’ll explore everything from choosing the perfect steamer type to understanding the ideal steaming temperature and duration.
This guide delves into the nuances of facial steaming, offering practical advice and expert tips for achieving optimal results. We’ll cover everything from preparing your skin before steaming to addressing common mistakes and troubleshooting issues. Ready to transform your skincare routine and reveal your most luminous complexion yet? Let's dive into our step-by-step guide to mastering the art of facial steaming.
Safety Guidelines
- Never fill the steamer with water exceeding the maximum fill line. Overfilling can cause burns or damage the device.
- Always unplug the steamer before filling, cleaning, or moving it. Never touch the nozzle while the steamer is on or immediately after use as it will be extremely hot.
- Do not use the facial steamer if you have any active skin conditions like severe acne, rosacea flare-ups, or open wounds. Consult a dermatologist before use if you have any skin concerns.
Methods: Using Distilled Water and Adding Herbs/Essential Oils
Tools Needed
- Facial Steamer
- Distilled water
- Herbs (optional)
- Essential oils (optional)
- Cotton ball (optional)
- Tea bag (optional)
- Herbs basket (optional)
Step-by-Step Instructions
Preparing the Steamer
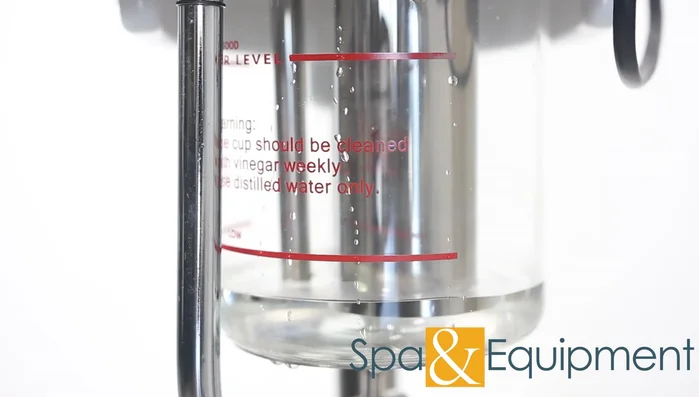
- Fill the beaker to the fill line with distilled water. You can add water from the top; no need to remove the beaker.
- If using herbs, place them in a small tea bag inside the herbs basket (if available).
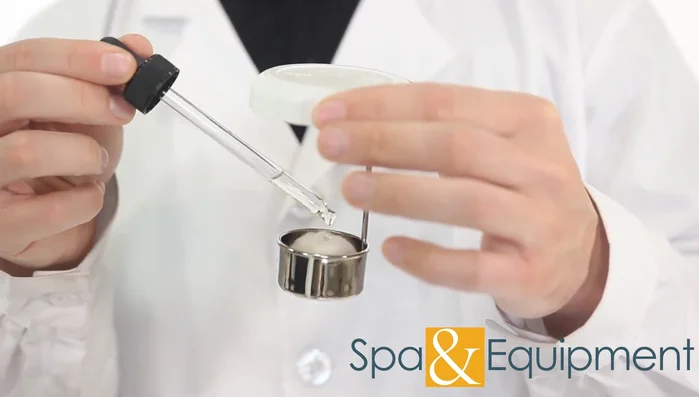
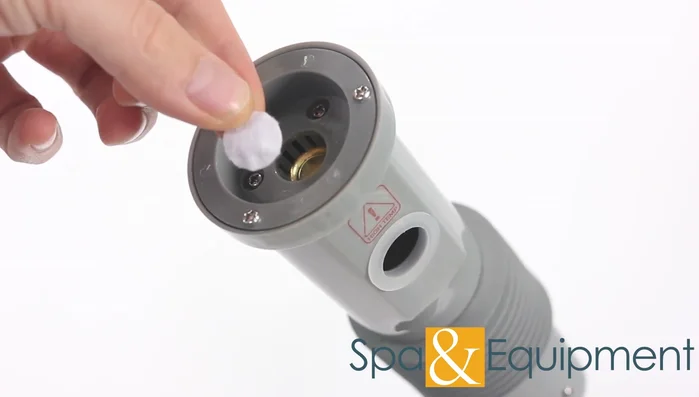
- For essential oils, place a cotton ball in the herbs basket and add a few drops of oil onto it. Alternatively, if your steamer has a cotton piece at the end of the nozzle, apply oil directly to it.
- If your steamer doesn't have a herbs basket, but has a cotton piece, you can place essential oils on it.

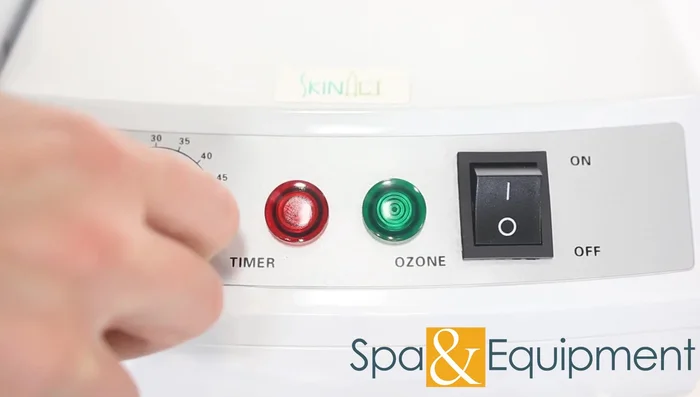
Preparing the Steamer Heating the Water
- Bring the water to a boil (instructions vary depending on steamer type - see below).
Heating the Water Applying the Steam
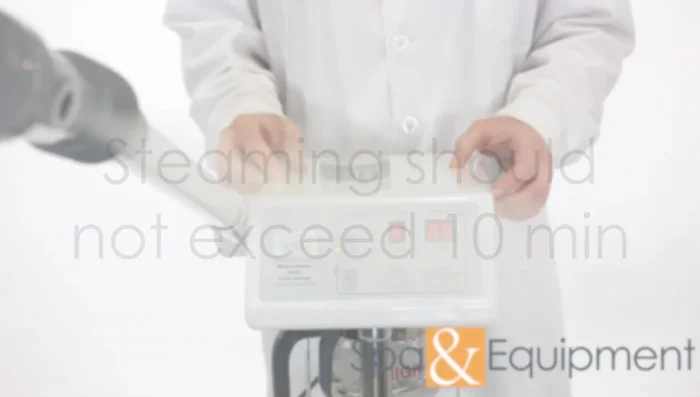
- Once steam is produced, keep the steamer nozzle at least 12 inches away from the client's skin.
- Do not exceed 10 minutes of steaming per client.
Applying the Steam
Tips
- Use distilled water to avoid mineral buildup. If your steamer doesn't recognize the distilled water brand, try a different brand or use tap water.
- Never add oils or herbs directly to the water.
- Remove the herbs basket when filling with water to prevent splashing.
Methods: Steamer Cleaning and Maintenance
Tools Needed
- Facial Steamer
- White vinegar
- Distilled water
- Mild detergent
Step-by-Step Instructions
Daily Maintenance
- After each use, let the steamer cool for 15 minutes, remove the beaker, and empty any excess water.
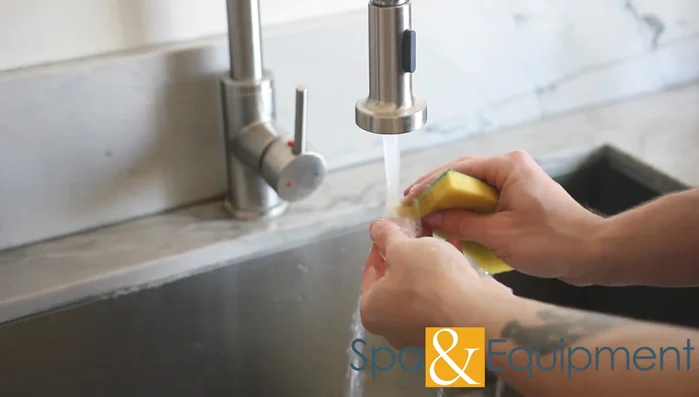
- Clean the beaker and gasket with tap water and mild detergent; allow to air dry overnight.
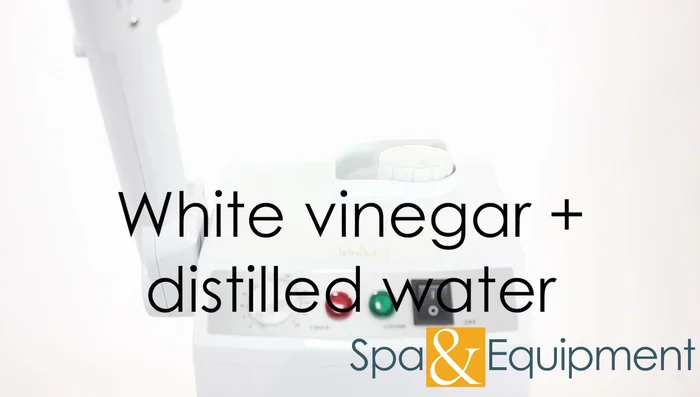
Daily Maintenance Monthly Deep Cleaning
- Fill the beaker with a 1:3 mixture of white vinegar and distilled water. Bring to a boil and let it run for 5 minutes. Then, rinse with distilled water and run the steamer for another 5 minutes.
Monthly Deep Cleaning
Read more: Effective Facial Steaming Methods: At-Home and Professional Techniques